Monday, 8 February 2016

Evaluation (Animation)

Animation Evaluation
I used Maya to animate my robot, I didn’t really encounter any problems in learning how to do this, as I already knew the basics of animation and how to do a basic walking movement on Maya, having learned it previously. 

The only problem I encountered when creating the animation was getting the joints to be turning at the right position which I needed them to be on each part, as it was quite hard to get them into the exact place as it needed to be very precise. I got past this by using the different camera views and zooming in very close to get the turning points of each joint to the correct place.

The process I used was to firstly just set the starting point of my animation, this is full sprint, so one leg stretched out forwards and the other backwards, then swapping the legs over to create the full running animation.

The technical skills I needed were to know the basics of animation through Maya, this includes taking keyframes and setting the correct speed for which the frames are played. I also needed to know how to create a basic walking animation.


I think that my animation went quite well and runs very smoothly when played back. If you look closer you can see each joint moving the way that they do in real life. 

Industry Software

In video game design/development there are a range of different sets of software, each doing what another may not be able to do, or being able to do it better.
The software used within games design ranges from painting/photo-manipulating software, to 3D modelling and sculpting software and even video editing software.

It is highly likely that at some point, all games designers/developers will use this software at some point so it is imperative that one is familiar with all of these different sets.


The History of 3D Animation

For us to better understand the evolution of animation through the years from an artists perspective, we were tasked with looking into the origins and earliest stages of computer animation.

Artist Research (Animator)


Evaluation (3D Model)

To make my 3D model I used Maya. Maya is a 3D modelling and animation software, which I was already fairly familiar with using, as I have used it in previous projects.
I feel like this was the best piece of software to use for this project because, as previously mentioned, I have already had experience in using this so I already knew how to use it and quite a few of the various tools that I needed to and because the robot that I was creating was rather square and it is very easy to create that sort of thing using Maya.

The process I used was to create the torso first, then expand outwards to the head and then legs, before moving on to animating my final model. The technical skills I needed were to create basic objects and manipulate them using the different tools within Maya. I encountered a problem when creating the legs for my model as I wasn’t entirely sure how to make the different joints at first and how to fit the leg at the hip to the torso. To solve this, I did some further research into the different kinds of joints, and changed the shape of the torso to better accommodate the hip joint.

Overall, I feel my 3D model was a success. I am happy with the final outcome and I think that I did well in creating my model with little to no help at all.

Friday, 5 February 2016

Maya: Creating and Animating My 3D Model

After researching into various different things and practicing creating some models in maya, I started to create my final robot. I started with just a rectangle two other flat square pieces for the panels that would be on the chest, and two spheres that would act as "shoulders".
Next I added two more rectangles with slightly more detail that would act as "arms" on either side.
Then, I began creation on my robots head. This too started with just a simple cube but eventually became the shape that I wanted.
After the head was finished, I moved onto the bottom half. Firstly creating the thigh, knee joint and calf, then onto the foot and ankle joint, then making sure it would all fit together, copying and flipping it, and replacing it on the other side..
I now needed a way to fit the ball and socket joint for the hip on the top of the legs, so I needed to adjust the shape of the robots body. I did this by just moving the vertices around and fixing them all together in different places, on each corner. And then created the ball and socket joint from my hip before attaching it to my model.
Now that my model was complete it was time to start the animation process! As I have previously used maya to make a simple walking animation, I knew how to make this happen quite easily as all my robot does is run.
I also edited all of the UV's for my model for texturing.

3D Research: Texture Mapping

What is a diffuse/colour map?
A diffuse map is the most commonly used form of texture map, it defines the colour and pattern of an object. Mapping the diffuse colour is like painting an image on the surface of the object.

What is a specular map?
Specular maps are used to define the shininess and highlight colour of an object/surface. The higher the value of a pixel, the shinier the object/surface will appear in-game.

What is a normal map?
Normal mapping or “Dot3 bump mapping” is a technique that is used to fake the lighting of bumps and dents, it is used to add more details without using more polygons.

What other kinds of texture mapping are there?
Parallax mapping: parallax mapping is an enhancement of the bump or normal mapping techniques applied in 3D rendering applications such as video games. To the end user, it means that textures such as stone walls will have more apparent depth and thus greater realism with less of an influence on the performance of the simulation.
Displacement mapping: displacement mapping is an alternative computer graphics technique in contrast to bump/normal/parallax mapping, using a procedural, texture or height map to cause an effect where the actual geometric position of points over the textured surface are displaced. It gives surfaces a great sense of depth and detail.
Reflection mapping: reflection or environment mapping is an efficient image based lighting technique for approximating the appearance of a reflective surface by means of a previously computed texture image.

What does PBR rendering mean?
Physically based rendering (PBR) refers to the concept of using realistic shading/lighting models along with measured surface values to accurately represent real-world materials. PBR is more of a concept than a strict set of rules and as such, the exact implementations of PBR systems tend to vary.

Joint Research

When creating any type of character, one would need to think of movement. For a person to be able to move, they have different types of joints in the body, so I did some research into what I would need for my robot. I found a good reference picture on the internet depicting various types of joints and their points in the body.
Now, as my robot only has legs, I only need a hip, knee and ankle joint. The hip would be a ball and socket joint, and the knee and ankle would both be saddle joints. Now that I knew this, I took to maya to practise creating these.
I started with some basic shapes and molded them into the correct shapes for the joints I was creating, Firstly the saddle joint as it is very simple to make and animate.
After creating this I moved onto creating and animating a ball and socket joint, which required some different shapes and tools to be created than the more simple saddle joint.
Doing this really helped me to understand the joints which I would need to use for my model and how to make them unaided.

3D Modelling Practice

Before starting my actual 3D model, I firstly had some practice in creating things from one shape. We were given a silhouette picture of a tap that we needed to create from a simple cube.
The first thing I had to do was create an image plane using the reference photo in maya, and then when I did this, I started modelling from a cube.
After doing this and scaling the cube up to a bigger size, I changed the amount of subdivisions all around the cube by using the attribute editor, and then I began to extrude the faces outwards to fit the silhouette of the tap.
At some points I had to make extra subdivisions to make sure that the shape would fit into the silhouette, I did this using the multi-cut tool before extruding the faces out further into the shape.
To finish up, I made the model smooth so that it looked much cleaner rather than just all square.
I feel like doing this has helped me to develop my skills within maya, expecially using the extrude and multi-cut tools.

Artist Research (3D Design)

Before moving my concept into maya to begin modelling, I did some research into some different 3D designers to see what different programmes they used and what tools they used within these programmes to help me better understand the software that I would be using to create my own model. I used the website artstation.com to find 3 different artists whose work stood out to me among the rest.
Here are the 3 artists which I found and looked into.

Group Critique (Initial 2D Designs)

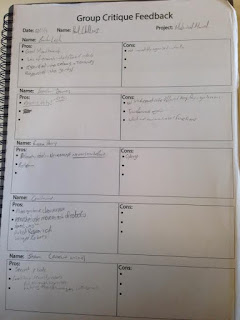
While coming up with out initial designs, we were split into two groups, within these groups we took turns to speak about our various initial ideas, what their purpose would be, where inspiration for them came from etc. and the rest of the group would tell whoever was presenting their ideas what they thought were pros and cons of each on the designs. Here is my sheet showing my critique on the groups work and also their critique on mine.

Thursday, 4 February 2016

Evaluation (2D Concept Design)

The theme of this project was “Mechanical marvel” and my task was to plan and create a 2D character and then create a 3D animated model from this design. The design and model would, as the title suggests, be a robot, or be mechanical in some way, and have a set purpose.

To start to gather ideas I looked at different types of robots from various different media platforms and from real life to help get an idea of what I wanted to create, what I wanted it to look like and what I wanted its purpose to be. I created two different moodboards of robots from existing games, movies and television series to help this. I also looked at simple mechanical parts to get ideas too and even looked at just metal walls to get ideas for the texture of different kinds of metal etc.
Of my 10 initial ideas, only two of them really appealed to me over the others, and I only carried one into development as I had not seen a robot with its purpose before. The basic idea was simply a humanoid robot with no arms, only legs, which would be a small security bot for use in shops, which would chase after shoplifters. I changed a few things about the base idea along the way, being small details in colours and switches and the head shape which changed entirely from the initial idea to the final piece from just a dome on the top of the shoulders to an odd shape which would be rather aerodynamic.

One thing which helped me come up with this idea was when we had pictures of small, odd mechanical pieces, which we needed to stick into our sketchbooks and create robots from these. One of the pieces was a rather oddly shaped piece with a rectangular centre, a circle on the top and two small pieces sticking out of the bottom, and I made this into a small robot with just legs, which is where the idea for my final piece came from.

I feel like my final concept was both successful and unsuccessful at the same time, successful because I feel I did well in turning the initial idea from the mechanical bit into this final design, which I have never myself seen before, and slightly unsuccessful because I found it quite hard to create the shadows and lights on my final piece as I didn’t exactly know where to shade because of the direction I had the robot facing etc. other than that I do feel it was successful myself.

Yes, I can use the various forms of research I did in future projects, as well as the skills I learned in photoshop on how to add different textures, shadows and lights to my work. I am very happy with my final piece and would not change any of it, although I would add more shadows and lighting detail if I could, but nothing other than that.

Photoshop: Final 2D Concept Artwork

Now that I had an outline for where the shadows would be on my robot I could begin to develop it further and make the shading seem more realistic and give more life to the artwork, while doing this I realised that the back foot was in the wrong position for the direction that my robot is running in my concept piece, so I amended this and drew up a new foot in a more suitable position, then I added more detailed shading and slight lighting on the corners which would be facing the light source.
Afterwards I only had smaller bits left to do until my piece was finished, I just increased the detail in my shading, adding more on in certain parts, including the eye and right side shoulder, and then adding lighter parts on the left leg until I felt that the concept was finished in my eyes.

Photoshop: Adding Colour and Basic Shadows

After adding the various bits of detail I wanted on my robot, I started to add the colours into it, being simple greys firstly and adding splashes of blue and yellow, as it is made for security purposes.
After this I removed the outlines that I started with, added red into the eye, and then started to add very basic shading to give it perspective on where the light is coming from in the concept.

Mechanical Bits, Initial and Developed Sketches

Before we started our initial sketches, we were given sheets with pictures of various different mechanical parts on. We needed to choose some of these parts, cut them out and stick them into our sketch books and then create a small robot from them. I liked this idea as it really helped to come up with some small initial sketches with little research.
After some initial research into different robots from various media platforms, I created some basic sketches and picked two which I liked from the few that I had drawn.
After this, I moved into photoshop with the one that I liked the idea of the most to develop them and created some silhouettes of the robot from different angles.
After creating these silhouettes, I took one of them and started on what would become my final photoshop piece, firstly by just adding some extra detail.

Wednesday, 3 February 2016

Contextual Studies

What is Art?
as a group we were all shown various different art pieces, and had to decide whether or not we each thought it could be called "art" or not. Obviously this sparked some dispute as some of the "art" pieces seemed rather ridiculous (one of which literally being a pile of bin bags) I had came to the conclusion that most were in fact art in their own way. Be it that they were simply different, or whether they depicted a beautiful thing, most of the pieces we were shown were art.
Impressionism Presentation
To better understand art, artists, their work and their methods, we were all split into groups and given a topic to research and produce a presentation on, my group was given "Impressionism" so we each did some research and created this:
Creatures and their symbolism in art
For our "Creature Feature" project, we had to better understand the symbolism and meaning behind creatures in art, in different cultures and throughout history. We were firstly tasked with finding the meaning behind 4 specific animals (Dove, Crocodile, Monkey and Butterfly) As well as then finding the meaning to three others of our own choice.
Here is the list of all of the animals we were firstly all asked to find the meaning behind:
And here are the 3 animals I chose to find myself:
Artist Research For our "Creature Feature" project I found two 2D artists who's work I absolutely loved, for their art styles they both used, the type of creatures they were creating, and the various software they would use to create their art, here is my work on them, including art from the two of them.
Comparison of artists To help us to experiment with different art styles, and to be able to detect and compare multiple differences between two artists, in this case the two artists were Michael Broom and H.R. Giger. These two artists both work on concept art for aliens and alien themed work, I created this venn diagram.